Featured image of post 搭建个人博客系列(二):hugo 使用 github actions 保存源码和自动化构建

搭建个人博客系列(二):hugo 使用 github actions 保存源码和自动化构建

hugo 使用 github actions 保存源码和自动化构建

前言

忙于工作,一周后的第二篇来了,在上一篇中我们搭建好了博客,并且将 public 下的文件上传到了 github pages 并成功显示。但是为了源码安全,源码和构建产物是分开两个仓库的,修改完后需要手动构建并手动推送,稍显麻烦。

那么这一篇呢,我们就让源码在发布的时候自动构建并推送到 github.io 这个仓库上。

自动化构建

github actions 是 github 提供的免费 CI/CD 功能,可以在代码提交后自动构建自动推送。

生成 personal_token

因为是分开两个仓库的,所以需要提供推送的权限,我们点击 github 头像位置,下拉栏中选择 Settings -> Developer Settings -> Personal access tokens -> Tokens(classic)

generate personal token

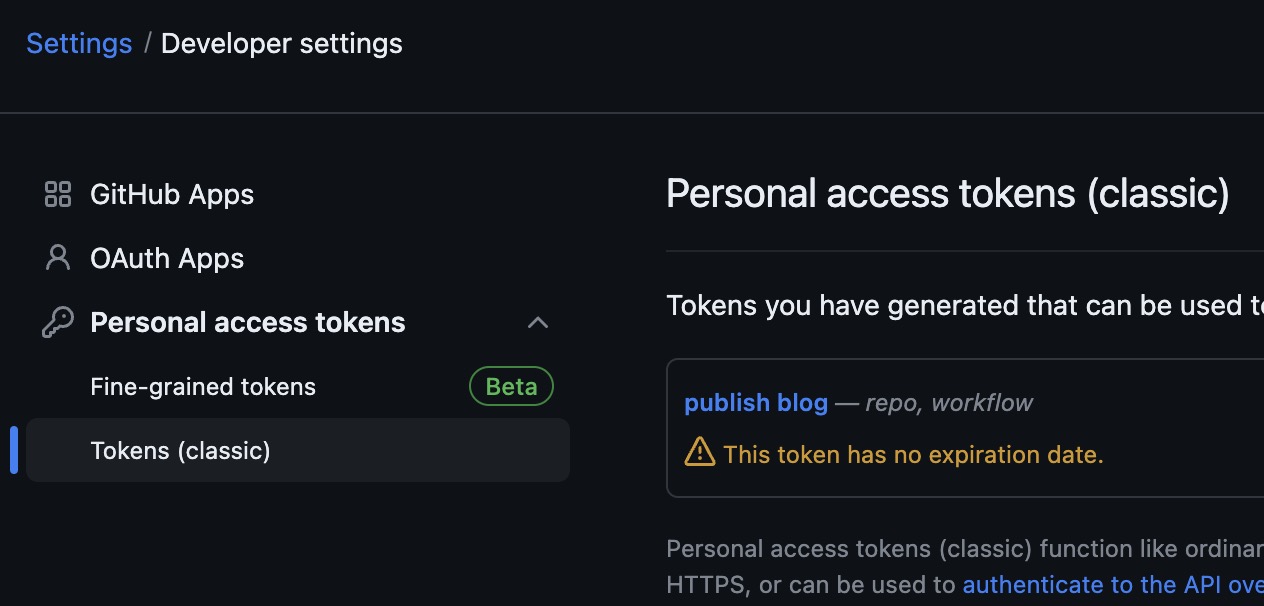
点击生成 token,Expiration 选择 no expiration, scopes 选择 repo、workflow 权限即可,新增后记得复制保存。

添加 personal_token

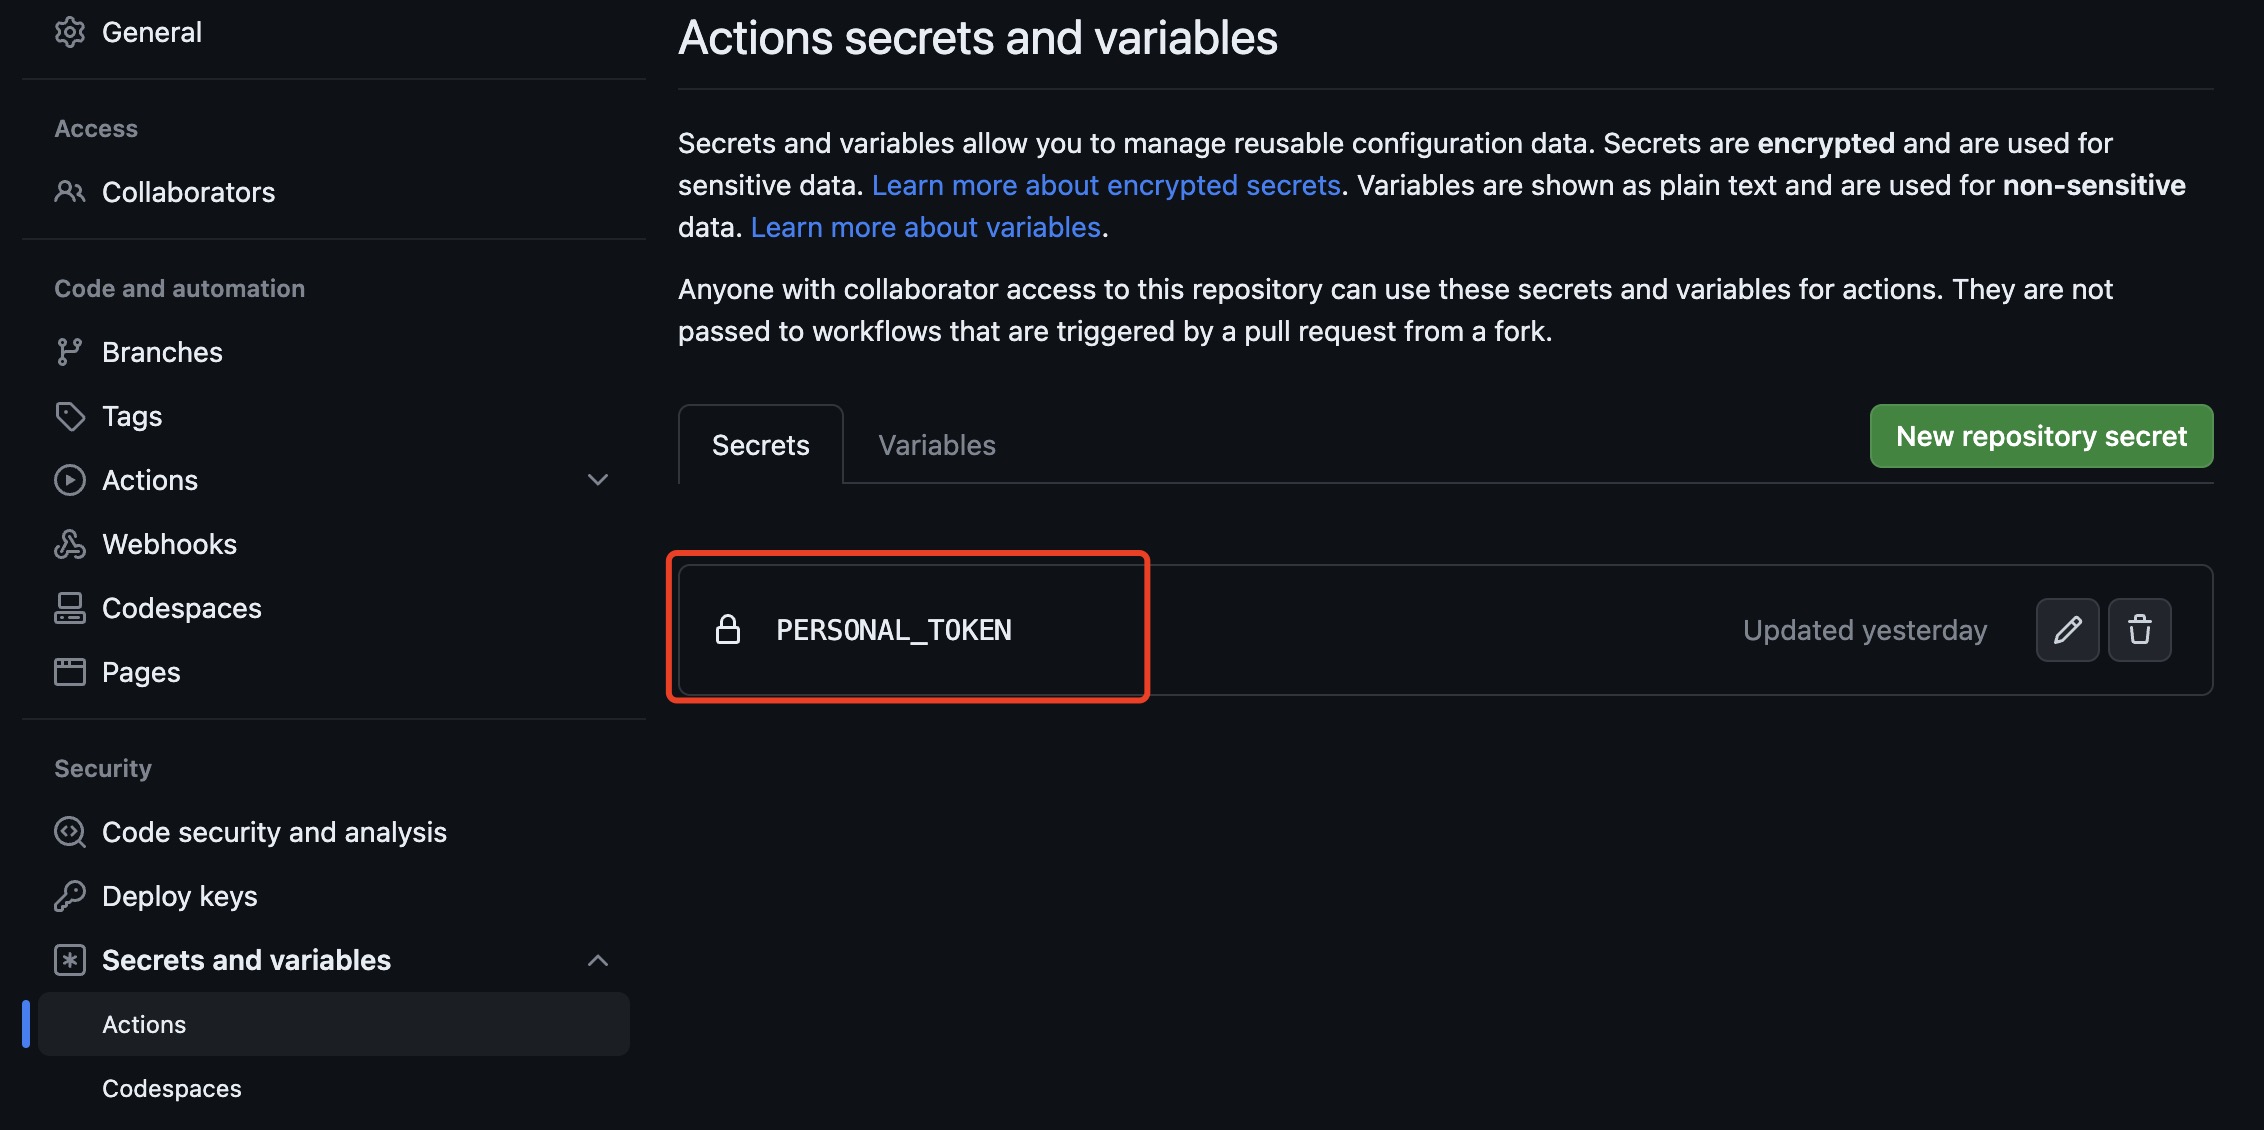
在 blog 的仓库中添加 token,注意是源码仓库。blog -> Settings -> Secrets and variables -> Actions 的 Secrets 中点击 New repository secret,把之前的 personal_token 贴上,名字就叫 personal_token,需要跟后面的 yml 配置文件保持一致。

add personal token

增加 deploy yml

在 blog 的根目录下新增 .github/workflows 目录,在该目录下新增 blog-deploy.yml 文件,示例配置如下:

 1
 2
 3
 4
 5
 6
 7
 8
 9
10
11
12
13
14
15
16
17
18
19
20
21
22
23
24
25
26
27
28
29
30
31
32
33
34
35
36
name: deploy

on:
    push:
        branches:
            - main
    workflow_dispatch:

jobs:
    build:
        runs-on: ubuntu-latest
        steps:
            - name: Checkout
              uses: actions/checkout@v3
              with:
                  submodules: true
                  fetch-depth: 0
                  ref: main # 这里选择你触发部署的分支!默认是 master

            - name: Setup Hugo
              uses: peaceiris/actions-hugo@v2
              with:
                  hugo-version: "latest"
                  extended: true # 用 stack 主题需要加这个配置

            - name: Build Web
              run: hugo --minify

            - name: Deploy Web
              uses: peaceiris/actions-gh-pages@v3
              with:
                  PERSONAL_TOKEN: ${{ secrets.PERSONAL_TOKEN }}
                  EXTERNAL_REPOSITORY: wingoftime/wingoftime.github.io # 改成你的仓库
                  PUBLISH_BRANCH: main
                  PUBLISH_DIR: ./public
                  commit_message: ${{ github.event.head_commit.message }}

修改代码并推送

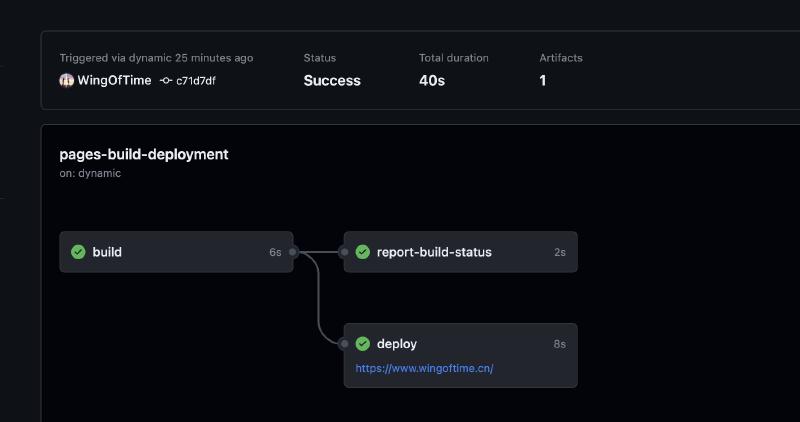
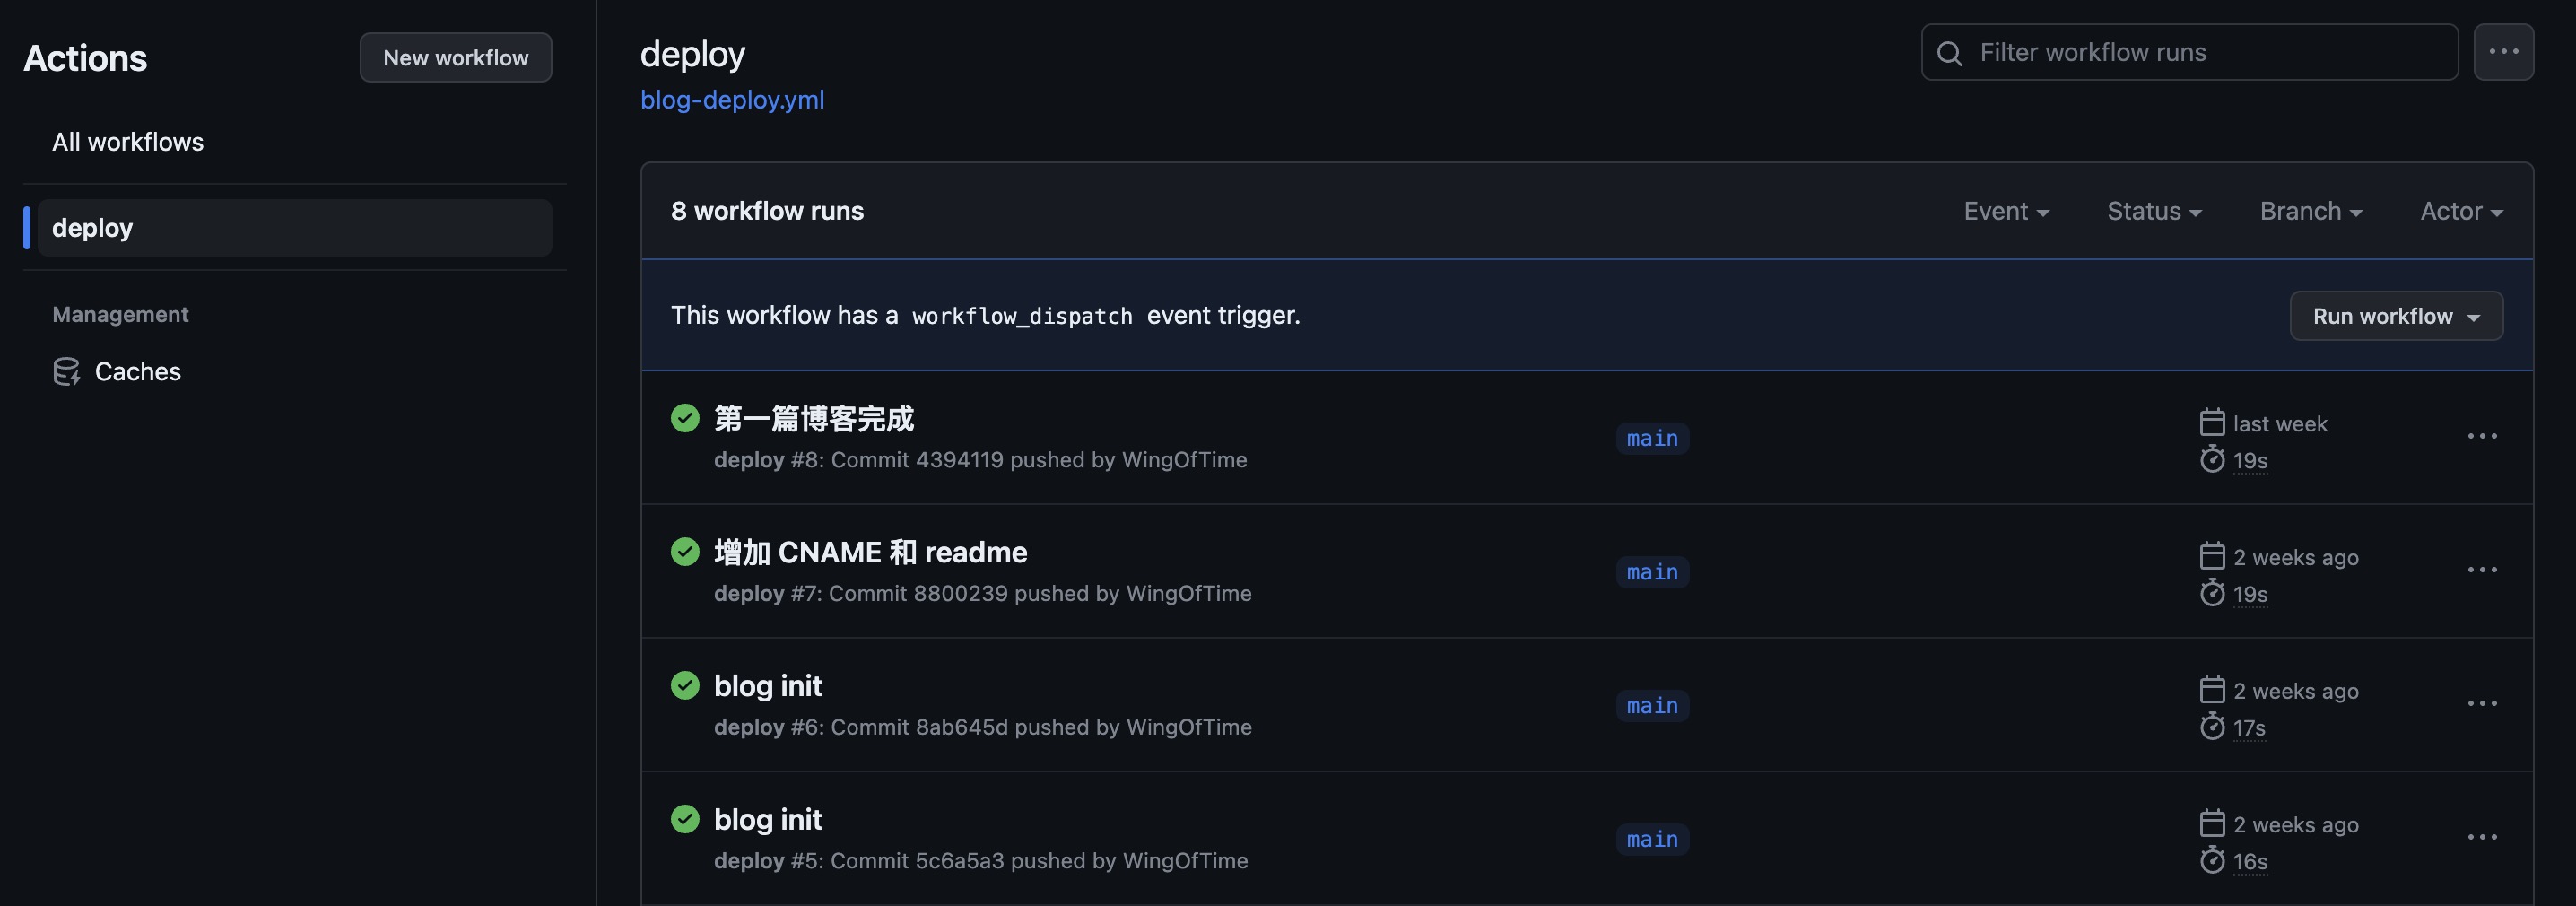
以上的设置都完成的话,修改博客代码后并推送,就可以在 github 网页上看到工作流了,示例如下:

github workflow

总结

得益于大佬们写的第三方包,这让整个发布代码变得非常精简,拉代码、安装、构建、发布。到这里估计就差不多了,至于自定义域名,首先要有域名注册及备案,其次跟着 github page 的文档来即可,总体比较简单,就不在这里啰嗦了。

Licensed under CC BY-NC-SA 4.0